How To make Pom-Pom Garland
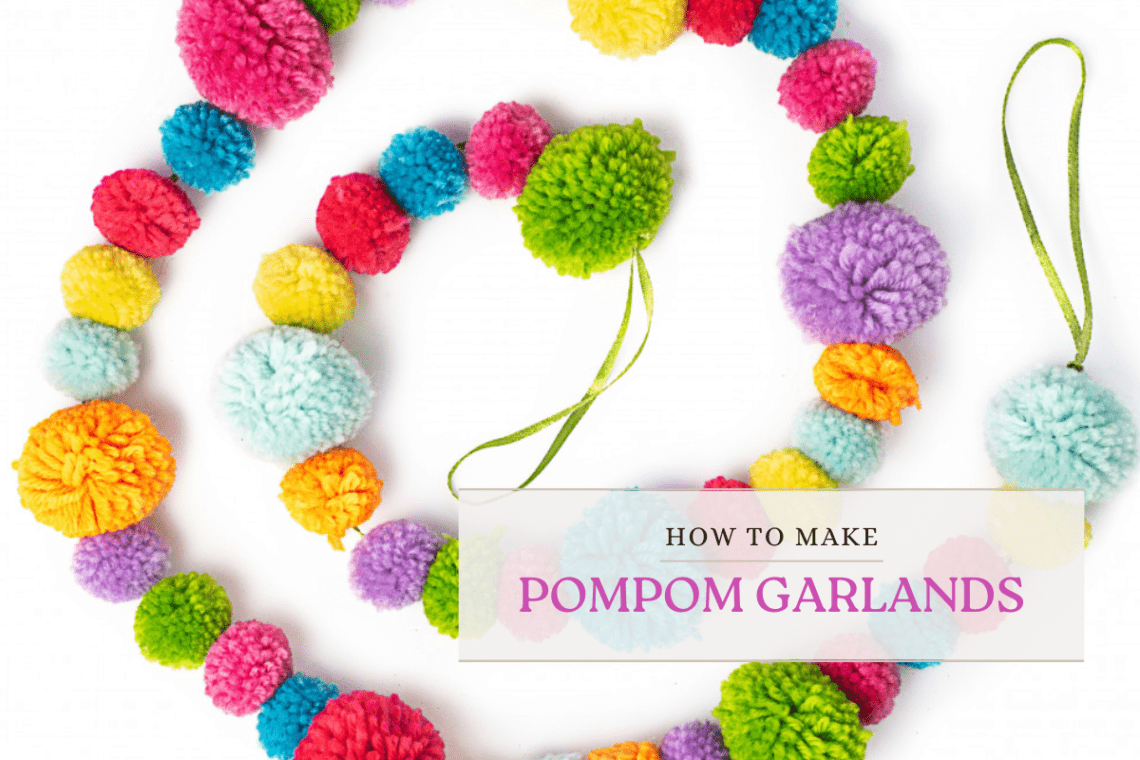
Pom-poms, in all their fluffy glory, have a magical way of infusing cheerfulness into any setting. Whether you want to spruce up your living room, decorate a party, or just add a touch of whimsy to a dull corner, pom-pom garlands are a fantastic choice. Not only are they fun to make, but they’re also an ideal project for using up leftover yarn scraps. Here’s a easy, step-by-step tutorial on how to make pom pom garland.
You can choose a single color scheme or mix and match your yarn scraps – the result is always a burst of color and texture that can brighten up any space.
What You’ll Need:
- Yarn Scraps: Gather your leftover yarn. The more colors, the merrier!
- Cardboard or a Pom-Pom Maker: You can fashion your own pom-pom templates from cardboard or invest in a pom-pom maker for quick and uniform pom-poms.
- Scissors: Sharp ones for cutting yarn and cardboard.
- Yarn Needle: A blunt-ended needle to thread your pom-poms.
- String or Twine: Something sturdy to string your pom-poms onto. Make sure it’s long enough for your desired garland length.
How to Make It Overview:
- Gather your leftover yarn.
- Create pompoms in various sizes using a pompom maker or by hand.
- String them onto a piece of yarn, spacing them out evenly.
- Hang your garland wherever you want a pop of color and whimsy.

Let’s Get Started
Step 1: Create Your Pompom Template
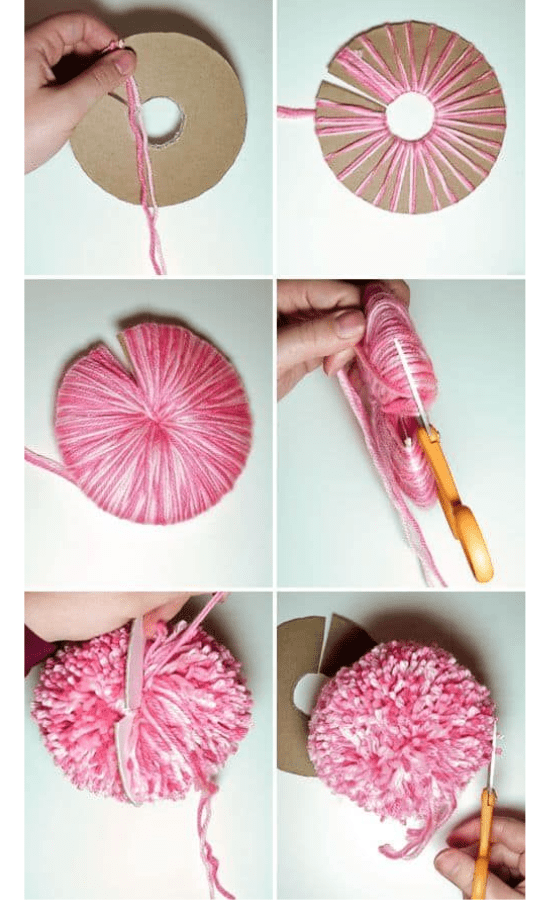
To make consistent-sized pompoms, start by creating a cardboard template. I’m using a small book as my template.
Take your cardboard and cut it to your desired pompom size. For reference, a 3-inch square works nicely, but feel free to go bigger or smaller depending on your preference.
In the center of your cardboard, cut two parallel slits about 1/2 inch apart. Make sure they’re wide enough to accommodate the yarn.

Step 2: Begin Wrapping Your Yarn
Hold the end of your first yarn color against the cardboard, slipping it into the slits to secure it.
Start wrapping the yarn around the cardboard template. The more you wrap, the fuller your pompom will be, so go wild if you want a plump pompom!
Step 3: Secure and Cut the Yarn
Once you’ve wrapped your yarn to your heart’s content, cut the yarn, leaving a few inches.
Slip the loose end through the slits, pulling it to the other side, and tie it tightly. This will secure your yarn bundle in place.
Step 4: Cut and Release the Pompom
Carefully slide your scissors between the two pieces of cardboard and cut the yarn along the outer edge.
Be sure to hold onto the tied section to prevent unraveling.
Step 5: Fluff and Shape Your Pompom
After you’ve cut all the way around, your pompom will look a bit wild and shaggy.
Give it a good shake and use your scissors to trim any uneven or stray strands until you achieve the desired round shape.
Step 6: String Your Pompoms
Thread a tapestry needle or a large sewing needle with your length of yarn or twine.
Carefully pass the needle through the center of each pompom, stacking them one after the other.
Step 7: Hang and Enjoy!
Once all your pompoms are strung, you can tie the ends of the yarn or twine to create loops for hanging. Find the perfect spot for your handmade pompom garland, whether it’s in your living room, bedroom, or even outside for a pop of color in your garden.
Don’t hesitate to experiment with different yarn colors, sizes, and arrangements. Personalize your garlands to match your unique style, whether it’s bright and bold or soft and subtle. The possibilities are endless, and each garland you create becomes a unique piece of art.
So, gather your yarn scraps, get your pompom-making groove on, and let your creativity run wild. Whether you’re adorning a special event, brightening up your living room, or adding a touch of whimsy to a child’s room, your DIY pompom garland is sure to make a statement.
I hope this “how-to make pom-pom garland” tutorial will help you on your crafting journey. As always, happy crafting!


