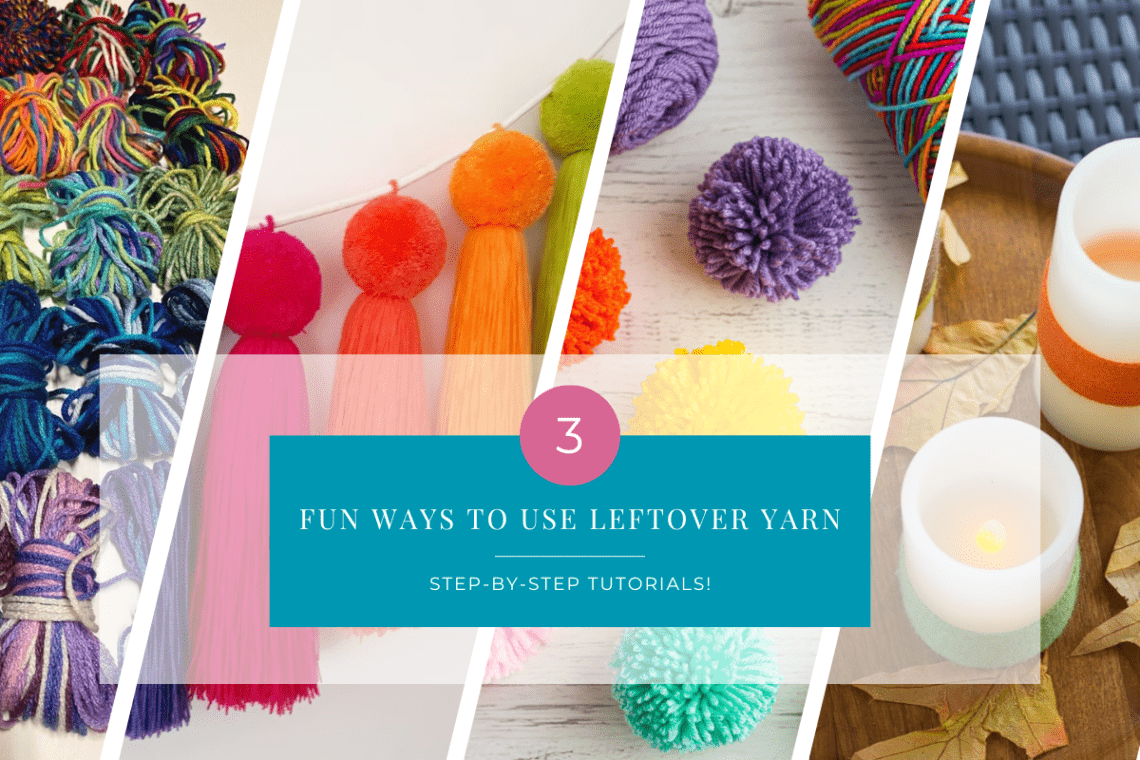
From Punch Needles to Pompoms: 3 Fun Ways to Use Leftover Yarn as craft projects
If you’ve recently completed a punch needling project and find yourself with a surplus of yarn scraps, you’re probably wondering what you can make out of the extra scraps. Personally, I would hate to throw away scraps and try to use then whenever I can.
It’s always a wonderful feeling to complete a punch needling project, but what do you do with those leftover yarn bits? With punch needling projects (or any large projects involving yarn), you’ll likely run into lots of leftover yarn. Here are some fun leftover yarn craft ideas to put those scraps into good use!
Wondering what punch needling is? Here’s a post on what you need to know to get you started!
Charming Pompom Garland

One of the simplest and most delightful ways to use your leftover yarn is by creating a charming pompom garland. Whether you choose a single color scheme or mix and match your yarn scraps, the result is always a burst of color and texture that can brighten up any space.
What You’ll Need:
- Leftover yarn in assorted colors
- A cardboard template (a small book or cardboard scraps work well)
- Scissors
- A tapestry needle or a large sewing needle
- A length of yarn or twine for stringing the pompoms
How to Make It Overview:
- Gather your leftover yarn.
- Create pompoms in various sizes using a pompom maker or by hand.
- String them onto a piece of yarn, spacing them out evenly.
- Hang your garland wherever you want a pop of color and whimsy.
Let’s Get Started
Step 1: Create Your Pompom Template
To make consistent-sized pompoms, start by creating a cardboard template. I’m using a small book as my template.
Take your cardboard and cut it to your desired pompom size. For reference, a 3-inch square works nicely, but feel free to go bigger or smaller depending on your preference.
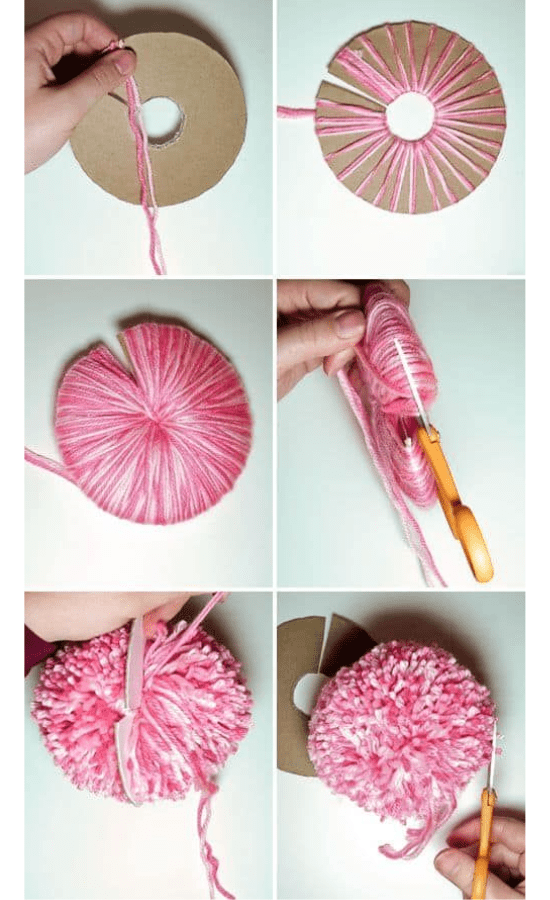
In the center of your cardboard, cut two parallel slits about 1/2 inch apart. Make sure they’re wide enough to accommodate the yarn.
Step 2: Begin Wrapping Your Yarn
Hold the end of your first yarn color against the cardboard, slipping it into the slits to secure it.
Start wrapping the yarn around the cardboard template. The more you wrap, the fuller your pompom will be, so go wild if you want a plump pompom!
Step 3: Secure and Cut the Yarn
Once you’ve wrapped your yarn to your heart’s content, cut the yarn, leaving a few inches.
Slip the loose end through the slits, pulling it to the other side, and tie it tightly. This will secure your yarn bundle in place.
Step 4: Cut and Release the Pompom
Carefully slide your scissors between the two pieces of cardboard and cut the yarn along the outer edge.
Be sure to hold onto the tied section to prevent unraveling.
Step 5: Fluff and Shape Your Pompom
After you’ve cut all the way around, your pompom will look a bit wild and shaggy.
Give it a good shake and use your scissors to trim any uneven or stray strands until you achieve the desired round shape.
Step 6: String Your Pompoms
Thread a tapestry needle or a large sewing needle with your length of yarn or twine.
Carefully pass the needle through the center of each pompom, stacking them one after the other.
Step 7: Hang and Enjoy!
Once all your pompoms are strung, you can tie the ends of the yarn or twine to create loops for hanging. Find the perfect spot for your handmade pompom garland, whether it’s in your living room, bedroom, or even outside for a pop of color in your garden.

Boho-Inspired Yarn Tassels
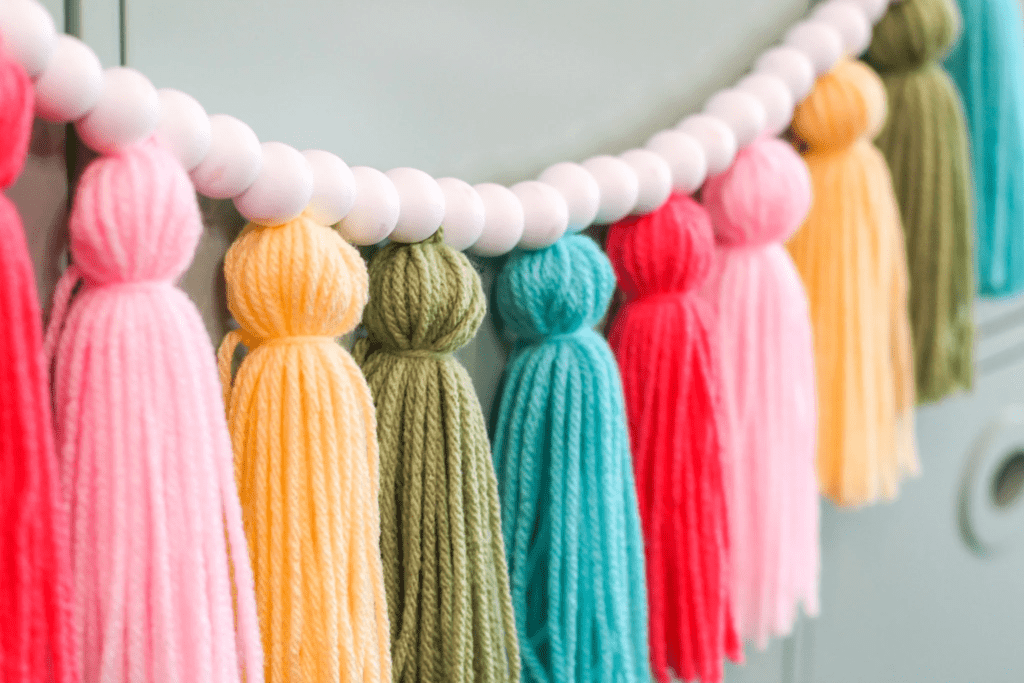
Boho chic is all about texture and free-spirited vibes, making yarn tassels a perfect fit. You can use them to accessorize bags, curtains, or even as keychains.
What You’ll Need:
- Leftover yarn in various colors and textures
- A piece of cardboard or cardboard template
- Scissors
- A ruler (optional)
How to Make It Overview:
- Cut a piece of cardboard to your desired tassel length.
- Wrap your leftover yarn around the cardboard several times, depending on the thickness you want.
- Carefully slide the wrapped yarn off the cardboard and tie a separate piece of yarn around the top to create a tassel head.
- Trim the bottom to even out the tassel, and you’re done!
Let’s Get Started
Step 1: Prepare Your Materials
Gather your materials and pick out the leftover yarn you’d like to use. The great thing about this project is that you can mix and match colors and textures to create a unique look.
Step 2: Create Your Template
Take your piece of cardboard or create a cardboard template. The width of your cardboard will determine the length of your tassel. If you want longer tassels, use a wider piece of cardboard. I usually aim for about 4-6 inches in width for a standard-sized tassel.
Step 3: Start Wrapping
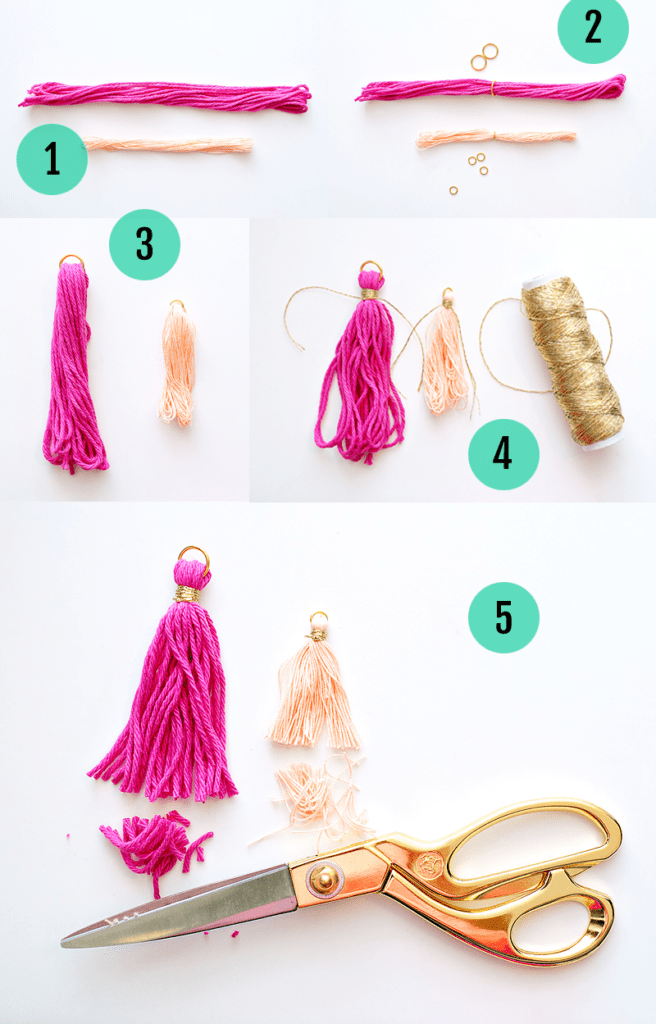
Hold your cardboard or template vertically. Take one end of your chosen yarn and start wrapping it around the cardboard width-wise. You can wrap it as many times as you want, depending on how thick you want your tassel to be. For a fuller tassel, wrap more yarn; for a thinner one, wrap less.
Step 4: Secure the Top
Once you’ve wrapped your yarn to your desired thickness, cut the end, leaving a few inches extra. Take this extra piece and slide it under the wrapped yarn at the top of your template. Tie it in a tight knot to secure all the strands together. This tied section will be the top of your tassel.
Step 5: Cut the Bottom
Now, take your scissors and carefully cut through the loops at the bottom of your wrapped yarn. This will create the fringed tassel look.
Step 6: Add a Hanger (Optional)
If you want to hang your tassel, cut a separate piece of yarn, fold it in half, and loop it through the top of your tassel. Tie a knot to secure it.
Step 7: Trim and Shape
With your scissors, trim any uneven strands to make the bottom of your tassel even. You can also trim the top if needed to make it neat and tidy.
Step 8: Fluff and Style
Gently fluff out the strands of your tassel to give it that boho-inspired, carefree look. You can trim it further if you’d like a neater appearance or leave it a bit wild for a more whimsical feel.
Step 9: Repeat and Enjoy
Repeat these steps for as many tassels as you desire, using different yarn colors and lengths to create a dynamic and eclectic collection of boho yarn tassels.

Cozy Yarn-Wrapped Candle Holders

Give your plain glass candle holders a cozy makeover with yarn. This craft is not only easy but also adds a warm, inviting touch to your space.
What You’ll Need:
- Glass Candle Holders: You can use any size or shape that suits your taste.
- Leftover Yarn Scraps: This is the fun part! Pick colors that complement your decor or go wild with a mix of hues.
- Craft Glue or Mod Podge: Something to adhere the yarn to the glass.
- Paintbrush: For applying the glue.
- Scissors: For trimming the yarn.
- Tea Light Candles: To complete the cozy ambiance.
How to Make It Overview:
- Grab some glass candle holders (votive or pillar).
- Start at the top, secure the yarn, and wrap it around the candle holder, changing colors or patterns as you go.
- Secure the end when you reach the bottom, and voilà!
Lets Get Started
Step 1: Prep Your Work Area
Set up a clean, well-lit workspace. Lay out all your materials within easy reach. This will make the crafting process smoother.
Step 2: Start Wrapping
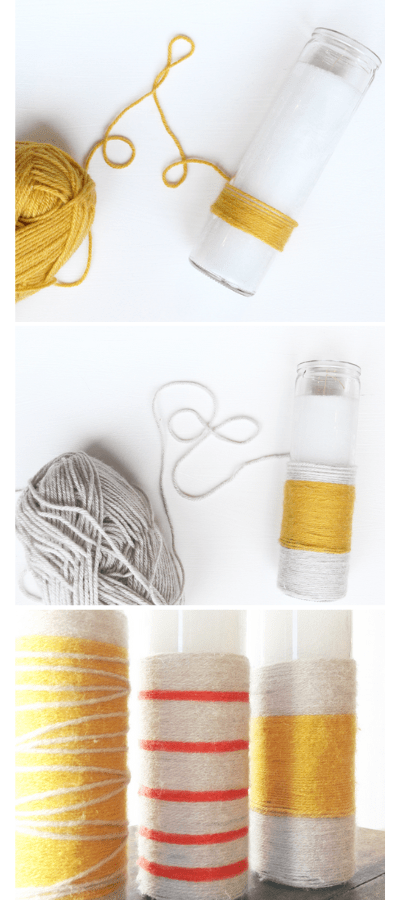
Begin by applying a small amount of craft glue or Mod Podge to the bottom of your glass candle holder. You only need a little to get started.
Take one end of your yarn and press it onto the glue. Hold it in place for a few seconds until it adheres.
Step 3: Wrap It Up
Once your yarn is secured at the bottom, start wrapping it around the glass. Make sure to keep the yarn snug but not too tight. This will give your candle holder a cozy, textured look.
Feel free to switch colors or add new yarn scraps as you go. Simply apply a small dab of glue, press the new yarn in place, and continue wrapping.
Step 4: Continue Wrapping
Keep wrapping until you reach your desired height or until you’re happy with how it looks. Leave a small space at the top and bottom of the glass uncovered for a clean finish.
Step 5: Secure the End
When you’re ready to finish, apply a bit more glue to the end of the yarn and press it onto the glass. Hold it for a few seconds to make sure it’s secure.
Step 6: Trim and Let It Dry
Trim any excess yarn from the top and bottom of the candle holder.
Set it aside to dry completely. This might take a few hours, so be patient.
Step 7: Add a Candle
Once your cozy yarn-wrapped candle holder is dry, simply pop in a tea light or votive candle, light it up, and bask in the warm and inviting atmosphere you’ve created.
These are four fantastic leftover yarn craft ideas to turn your scrap yarn into charming, functional pieces of art. The best part? These projects are not only fun but also sustainable, giving new life to those beautiful yarn scraps. So, raid your yarn stash, get your creative juices flowing, and let’s turn those leftovers into something amazing!

